Are you wondering how to test the ground with a multimeter in your car? Based on my experience, I can claim that electrical issues can be frustrating. Still, by understanding the process of testing ground connections using a multimeter, you can effectively diagnose and resolve such problems. In this guide, we will walk you through the step-by-step process of testing ground connections with a multimeter. So, let’s dive in and learn how to test the ground with a multimeter like a pro!
Understanding grounding in a car

Definition of ground and its role in electrical circuits
Grounding is a fundamental concept in electrical circuits, and it plays a critical role in ensuring the safety and proper functioning of a car’s electrical system. In simple terms, ground serves as a reference point or a common return path for electrical currents in a circuit. It provides a direct path for the flow of excess electrical energy, preventing potential damage to components and reducing the risk of electrical shock.
Types of ground connections in a car
Understanding the different types of ground connections in a car is essential for effective troubleshooting and maintenance. Here are the common types of ground connections you may encounter:
- Chassis ground: As mentioned earlier, the car’s chassis serves as a primary ground connection. It is a reliable and easily accessible grounding point for many electrical components.
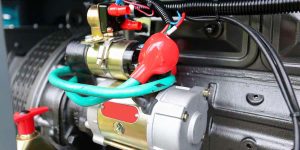
- Engine ground: The engine block is often connected to a separate ground point to ensure proper grounding for engine-related components. This connection is important for the performance and reliability of engine functions.
- Body ground: In some vehicles, a dedicated body ground connection exists, providing a grounding point specifically for body-mounted electrical components such as lights, wipers, and power windows.
Common symptoms of poor grounding
Poor grounding can lead to a variety of electrical issues in a car. Recognizing these symptoms can help pinpoint and resolve grounding problems. Here are some common signs of poor grounding:
- Electrical malfunctions: Erratic behavior of electrical components, such as flickering lights, malfunctioning gauges, or intermittent power loss, can indicate grounding issues.
- Excessive heat: Overheating of electrical components or wiring can be caused by inadequate grounding, leading to potential damage or even fire hazards.
- Radio interference: Poor grounding can result in radio interference or static noise in audio systems, affecting the overall sound quality.
Precautions and safety measures
Importance of disconnecting the battery before testing
This step helps prevent accidental short circuits and ensures your safety during the testing process. Here’s why it is important:
- Avoiding electrical hazards: Disconnecting the battery eliminates the risk of electrical shock while working with the electrical components of the car.
- Preventing damage to the equipment: Accidental contact between the multimeter probes and live electrical circuits can damage the multimeter or other testing equipment. Disconnecting the battery reduces this risk.
Tips for safe handling of electrical components
When working with electrical components, it is essential to follow safety guidelines to minimize the risk of injury or damage. Here are some tips for safe handling:
- Wear protective gear: Use insulated gloves and safety goggles to protect yourself from potential electrical hazards.
- Handle components with care: Avoid excessive force or rough handling when working with electrical components to prevent damage or accidental disconnection.
- Inspect for damaged wires or connectors: Before proceeding with testing, visually inspect wires and connectors for any signs of damage, such as frayed insulation or loose connections.
Testing ground connections

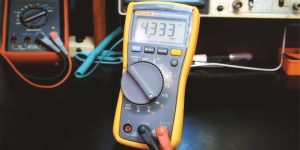
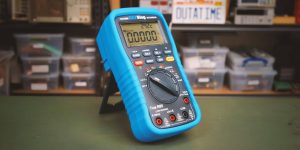
Setting up the multimeter for resistance testing
Before testing the ground connections in your car using a multimeter, it is important to set it up correctly for resistance testing, including when you want to test a ground wire. Here’s how to do it:
- Select the resistance (Ω) mode: Turn on your multimeter and set it to the resistance mode. It is usually denoted by the Ω symbol.
- Choose the proper range: Select an appropriate range for resistance testing. Start with the highest range available and gradually decrease it until you get a more accurate reading.
- Zero the multimeter: If your multimeter has a zeroing or auto-zeroing function, activate it to ensure accurate readings.
- Prepare the probes: Insert the black probe into the common (COM) terminal and the red probe into the terminal labeled for resistance (Ω) measurements.
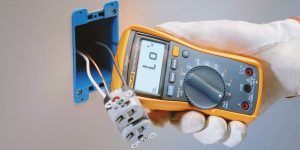
Step-by-step process for testing ground connections
Follow these steps to test the car ground connections, including the ground wire, using a multimeter:
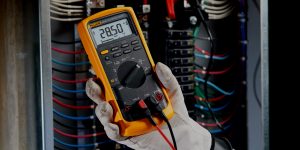
- Set the multimeter: Set it to the resistance (Ω) mode and choose an appropriate range for the expected resistance values.
- Probe the ground point: Touch the multimeter’s black probe to a known good ground point, such as the vehicle’s chassis.
- Test the ground connection: With the black probe still connected to the known good ground point, touch the multimeter’s red probe to the ground point you want to test.
- Read the multimeter: Observe the multimeter reading and note the resistance value displayed.
Interpreting multimeter readings and diagnosing potential issues:
- Low resistance: Indicates a good ground connection (near zero ohms).
- High resistance: Suggests a poor ground connection. Check for loose connections, corrosion, or damaged wires.
- Open circuit: Displays infinite resistance, indicating a complete break in the ground connection. Inspect for faults or disconnections in wiring and connectors.
- Inconsistent readings: Fluctuating or inconsistent readings may signal an intermittent ground connection. Check for loose connections or damaged wiring.
By following this procedure and accurately interpreting the multimeter readings, you will be able to identify and correct problems with the grounding of your vehicle’s electrical system.
We are supported by our audience. When you purchase through links on our site, we may earn an affiliate commission at no extra cost to you.

 Best Multimeter For HVAC Technicians Reviews
 Best Automotive Multimeter Reviews
 Fluke 117 Review
 How Does a Clamp Meter Work? And When To Use It?
 What Can You Measure With a Multimeter?
 What Type of Multimeter Do I Need?
 How To Calibrate a Multimeter?
Our newsletter
* We will never send you spam or share your email with third parties