Are you wondering how to test a starter with a multimeter? If so, you have definitely come to the right place!
The starter is a vital component responsible for initiating the engine’s rotation in an automotive system. It’s important to ensure the starter is functioning properly to avoid unexpected breakdowns. By utilizing a multimeter, you can perform effective diagnostics to determine if your starter is at fault.
In this guide, I will not only explain the principles of automotive starters but also give instructions on testing a starter with a multimeter. With this knowledge, you’ll be equipped to identify and troubleshoot starter issues with confidence.
Essential safety tips when working with starters and multimeters

Based on my experience, I can claim that when it comes to working with starters and multimeters, safety should always be a top priority. To ensure a secure testing process and prevent any accidents, follow these essential safety tips:
- Wear protective gear: Prioritize safety by wearing appropriate protective gear, such as safety glasses and insulated gloves. This will shield you from potential electrical shocks and flying debris.
- Disconnect the battery: Before working on the starter or using a multimeter, disconnect the vehicle’s battery to minimize the risk of electric shock or short circuits.
- Inspect the equipment: Before use, carefully examine both the multimeter and starter for any signs of damage or malfunction. Avoid using faulty equipment to prevent accidents.
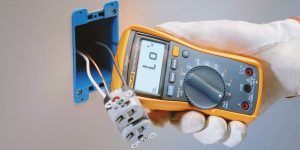
- Familiarize yourself with the multimeter: Read the multimeter’s user manual to understand its functions and settings. Ensure that you know how to properly operate the multimeter before testing the starter.
- Set the multimeter to the appropriate mode: Depending on the type of multimeter you have, select the correct mode for testing electrical continuity or resistance. Incorrect settings can lead to inaccurate readings or damage to the meter.
- Avoid contact with moving parts: When testing the starter, keep your hands and tools clear of any moving components, such as belts, pulleys, or fans. Accidental contact can cause injuries.
- Secure the vehicle: Ensure the vehicle is in a stable and secure position, with the parking brake engaged, to prevent any unexpected movements during testing.
- Take precautions with live circuits: When testing live circuits, be extra cautious. Avoid touching exposed wires and use insulated probes to prevent electric shocks.
Remember, these safety tips are general guidelines, and it’s important to consult the specific safety recommendations provided by the multimeter manufacturer and your vehicle’s manufacturer. Prioritize your well-being and take the necessary precautions to perform starter testing with confidence and peace of mind.
Getting started: pre-test procedures

Before diving into testing the starter with a multimeter, there are a few essential pre-test procedures to follow. These steps will ensure that you have the necessary tools, proper access to the starter, and a well-prepared multimeter. Let’s explore each of these aspects in detail:
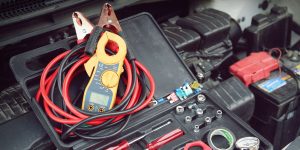
Gathering necessary tools
To perform the starter test effectively, gather the following tools:
| Tools | Purpose |
|---|---|
| Multimeter | Measures electrical values and continuity |
| Safety gloves | Protects hands from electrical hazards |
| Safety glasses | Shields eyes from debris and sparks |
| Socket set | Allows removal of starter bolts/nuts |
| Wire brush | Cleans battery terminals and connections |
Accessing the starter
- Park the vehicle in a safe location: Choose a flat surface with ample space to work around the vehicle.
- Lift the hood: Engage the hood release lever inside the vehicle and prop the hood open securely.
- Locate the starter: Consult the vehicle’s manual to identify the starter’s location. It is typically situated near the engine, connected to the flywheel or flexplate.
- Disconnect the battery: Before accessing the starter, disconnect the negative (-) battery cable using a wrench. This precaution ensures safety and prevents accidental electrical contact.
Preparing the multimeter
- Select the appropriate setting: Set the multimeter to the DC voltage (V) mode or continuity (Ω) mode, depending on the specific test you plan to conduct.
- Check the multimeter’s leads: Inspect the leads for any signs of damage or fraying. Replace them if necessary to maintain accurate readings.
- Set the range: If your multimeter has a manual range selection, set it to a suitable range higher than the expected voltage or resistance.
Following these preliminary procedures will create the necessary conditions for an efficient and secure testing process.
A step-by-step guide to testing a starter with a multimeter

Setting up the multimeter
To properly set up the multimeter for testing the starter, follow these steps:
- Turn on the multimeter: Ensure that the multimeter is powered on and functioning correctly.
- Select the voltage (V) mode: Set the multimeter to the DC voltage mode. On most multimeters, this will be represented by a “V” with a straight line above it, indicating direct current measurement.
- Set the range: Adjust the multimeter’s range to the 20V DC setting. This range allows for accurate voltage readings within the expected range of the starter’s electrical system.
Checking for voltage drop
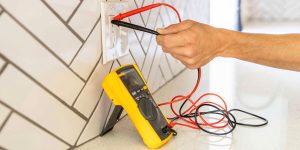
- Attach the multimeter leads: Connect the multimeter’s positive lead (usually colored red) to the battery’s positive terminal (+). Attach the multimeter’s negative lead (usually colored black) to the starter’s positive terminal (+).
- Request assistance: Ask a helper to turn the ignition key to the “ON” position without starting the engine.
- Read the multimeter: Look at the multimeter’s display and note the voltage reading. This reading represents the voltage drop between the battery and the starter during the ignition process. Ensure that the multimeter leads make secure and proper contact with the battery and starter terminals to obtain accurate readings.
Checking the starter solenoid
To test the starter solenoid, follow these steps:
- Move the multimeter’s negative lead: Disconnect the multimeter’s negative lead from the starter’s positive terminal (+) and connect it to the solenoid’s terminal.
- Keep the positive lead on the battery terminal: Leave the multimeter’s positive lead securely attached to the battery’s positive terminal (+).
- Request assistance: Ask your helper to turn the ignition key to the “START” position while you monitor the multimeter.
- Read the multimeter: Check the multimeter’s display for the voltage reading during the starting process.
Checking the starter motor
- Move the multimeter’s negative lead: Disconnect the multimeter’s negative lead from the solenoid terminal and connect it to the starter motor terminal.
- Request assistance: Once again, have your helper turn the ignition key to the “START” position while you observe the multimeter.
- Read the multimeter: Monitor the multimeter’s display to note the voltage reading during the starting process.
Interpreting the results
After conducting the tests on the starter and analyzing the readings obtained from the multimeter, it’s important to interpret the results accurately. Here’s how to make sense of the test outcomes:
- If the starter passed all the tests: If the voltage drops measured during the tests were within the acceptable range (typically below 0.5 volts), and the starter showed no signs of malfunction or abnormal behavior, it is likely in good working order. This indicates that the starter itself is not the cause of any starting issues you may be experiencing.
- If the starter failed one or more tests: If the voltage drops measured during the tests exceeded the acceptable range (above 0.5 volts) when checking the starter with a multimeter, or if you observed irregularities, such as abnormal sounds or sluggish engagement, there may be an issue with the starter.
In the case of a failed test, further troubleshooting may be required to pinpoint the exact cause of the problem. This could involve inspecting the wiring connections, solenoid contacts, or the starter motor itself for any signs of damage, wear, or malfunction.
Remember, while the tests performed with a multimeter provide valuable insights, they are not a definitive verdict. If you encounter any difficulties or are unsure about the results, it is always advisable to consult a professional mechanic or refer to the vehicle’s service manual for more specific guidance on troubleshooting and repairing the starter system.
We are supported by our audience. When you purchase through links on our site, we may earn an affiliate commission at no extra cost to you.

 Best Multimeter For HVAC Technicians Reviews

 Best Automotive Multimeter Reviews
 Fluke 117 Review
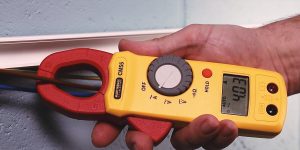 How Does a Clamp Meter Work? And When To Use It?
 How To Test Ground On A Car With Multimeter?
 What Can You Measure With a Multimeter?
 What Type of Multimeter Do I Need?
 How To Calibrate a Multimeter?
Our newsletter
* We will never send you spam or share your email with third parties