If you are using a multimeter and the fuse is blown, there are a few things you can do to determine what is wrong and fix it. In this blog post, we will cover some troubleshooting techniques for when the fuse in your multimeter is blown.
We will also provide some tips on how to prevent this from happening again in the future. Stay tuned for more helpful information on using your multimeter!
What is a fuse?
A fuse is a device used to protect electrical circuits from excessive current. The fuse contains a thin strip of metal that melts when the current passing through it exceeds the fuse’s rated value, thus opening the circuit and preventing further flow of current.
Why do fuses blow?
Measuring the current inappropriately
One of the most common reasons fuses blow is that they are used to mismeasure current. For example, using a 100-amp fuse to measure a current more significant than 10 amps will cause the fuse to blow.
Using the wrong size or type of fuse
Another common reason for blown fuses is using the wrong size or type of fuse for your working circuit. For example, using a 100-amp fuse in a circuit rated for 60 amps will cause the fuse to blow.
Short circuits
Short circuits are another common cause of blown fuses. A short circuit occurs when there is a break in the electrical path between the positive and negative sides of a circuit. For example, it can happen if the insulation on a wire is damaged or if a wire comes in contact with a metal object.
Switching the multimeter to measure voltage instead of current
When measuring current, you must set the multimeter to the correct range. The fuse will blow if the multimeter is set to measure voltage instead of current.

Testing the fuse with a multimeter
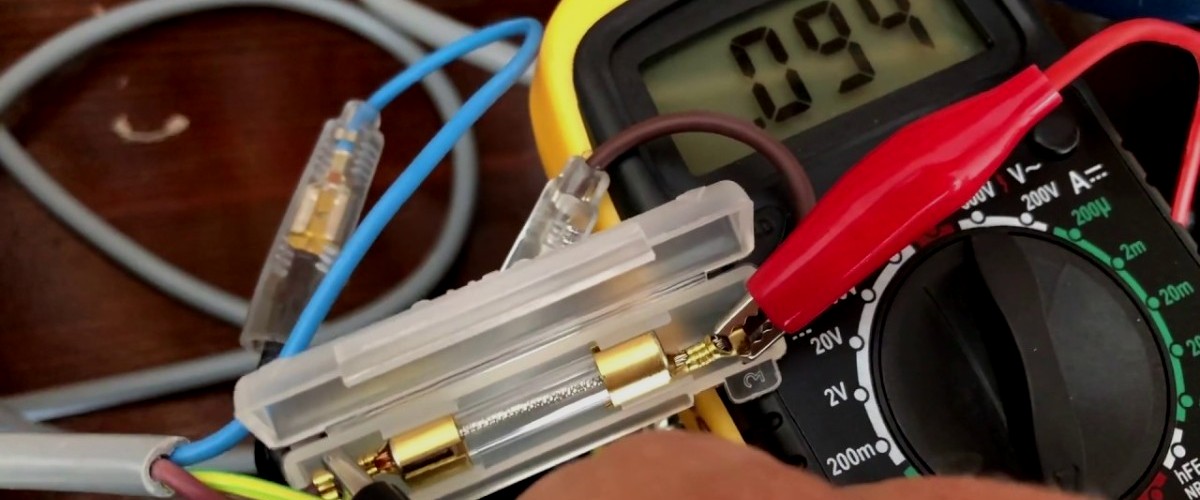
Once you have determined the cause of the blown fuse, the next step is to test the fuse with a multimeter. It will help you determine if the fuse is damaged or needs replacement.
To test the fuse, set the multimeter to the ohmmeter function and place the probes on either end of the fuse. If the multimeter shows a reading of infinity, the fuse is open and needs to be replaced. Likewise, if the multimeter shows a zero reading, the fuse is shorted and needs to be replaced.
Testing the fuse without a multimeter
Visual inspection
If you don’t have a multimeter, you can still test the fuse using the visual inspection method. To do this, simply remove the fuse from the circuit and hold it to light. If the fuse is blown, you can see through it.
With a fuse tester
Another way to test the fuse without a multimeter is with a fuse tester. It is a tool that is specifically designed for testing fuses. To use the fuse tester, insert the fuse into the tester and observe the reading. If the reading shows that the fuse is blown, you should replace it.
With a light bulb
To do this, remove the fuse from the circuit and connect it in series with a light bulb. If the fuse is blown, the light bulb will not light up.
With a continuity tester
It is a tool specifically designed for testing electrical circuits for continuity. To use the continuity tester, place the probes on either end of the fuse. If the tester beeps, then the fuse is good. However, if there is no sound, the fuse is blown and must be replaced.
With a battery and wire
It is a more simple way to test the fuse, but it will only tell you if the fuse is blown or not. To do this, simply remove the fuse from the circuit and connect one end of a wire to the positive terminal of a battery and the other end to one end of the fuse. Then, connect the fuse’s other end to the battery’s negative terminal. If the fuse is blown, the circuit will not be completed, and the battery will not light up the bulb.

Replacing the fuse
Once you have determined that the fuse needs replacement, the next step is to find a replacement fuse with the same rating as the one that blew. It’s essential to use a fuse with the same rating, as using a fuse with a higher rating can cause damage to the multimeter. This information is usually printed on the side of the fuse.
After finding a replacement fuse, remove the old fuse from the circuit and insert the new one. Insert the new fuse into the circuit in the same direction as the old fuse. Now that you have replaced the fuse, your multimeter should be working correctly again.
Test the multimeter before using it on an electrical circuit to ensure it is working correctly. If the fuse blows again, this is likely due to one of the issues we discussed earlier. Double-check that you are using the multimeter correctly and that you are using the correct size and type of fuse for the circuit.
How to prevent a fuse?
Use the correct size and type of fuse for the circuit you’re testing. If you’re not sure which size or type of fuse to use, consult the owner’s manual for your multimeter.
You can also prevent fuses from blowing by making sure that you’re using the multimeter correctly. For example, always use the multimeter in the correct voltage range for the circuit you’re testing. Also, never use the multimeter to test AC unless it is specifically designed for that purpose.
Lastly, make sure to regularly check the condition of your fuses and replace them if they are damaged or blown. Taking these precautions can help prevent damage to your multimeter and keep it working correctly for years.
We are supported by our audience. When you purchase through links on our site, we may earn an affiliate commission at no extra cost to you.
Our newsletter
* We will never send you spam or share your email with third parties


